
In this article, you will learn about the basics of PHP installation. How we can install PHP manually and also install PHP using XAMPP stack.

| Install PHP using XAMPP |
| Installing XAMPP on windows |
PHP Installation from XAMPP
What you should know?
To install PHP, we need the combination of Apache, PHP, MySQL and phpMyAdmin from xampp.
You can manually install PHP, but here you will learn how to install it as a package.
Note: XAMPP is the most popular PHP development environment.
XAMPP is a completely free, easy to install Apache distribution containing MariaDB, PHP, and Perl. The XAMPP open source package has been set up to be incredibly easy to install and to use.
Installing XAMPP on windows: Step by step guide
Step 1:
First of all, download xampp.
https://www.apachefriends.org/index.html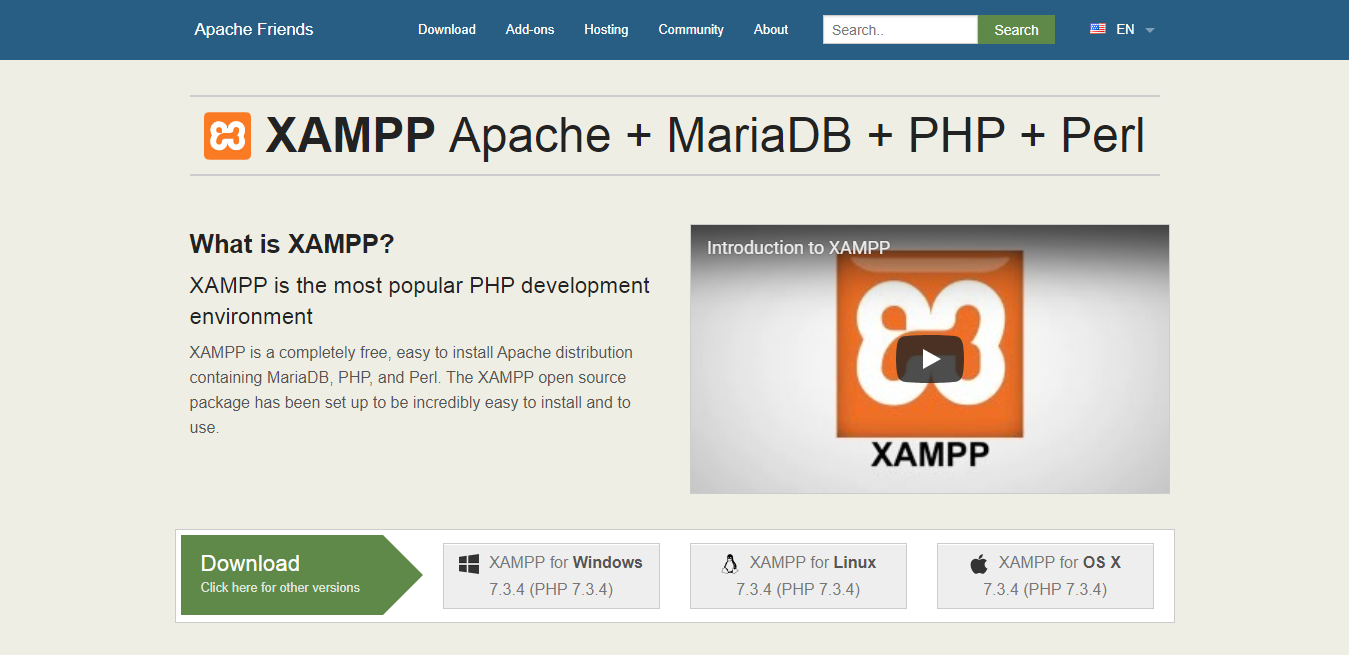
Click XAMPP for windows and it will automatically start to download the installer version. The downloaded file is named xampp-windows-x64-7.3.4-0-VC15-installer.exe(or latest version till date). Save the downloaded file on your hard disk or desktop.
Step 2:
After downloading from the official website.
- Navigate to the location where you saved the downloaded XAMPP file.
- Double-click the file name. The Installation Wizard starts.
- Read and click through the next few windows.
- Choose all the normal setting and complete the installation.
- Click finish.
Step 3:
Most importantly, To test your installation, open the XAMPP control panel. When the control panel is running, its icon is in your system tray. You can click the icon to open the Control Panel. If you do not have the icon in your system tray, you can start the Control panel from the start menu by choosing the following:
Start->All Programs->Apache Friends->XAMPP->XAMPP Control PanelThe open Control Panel with Apache and MySQL running is shown below.
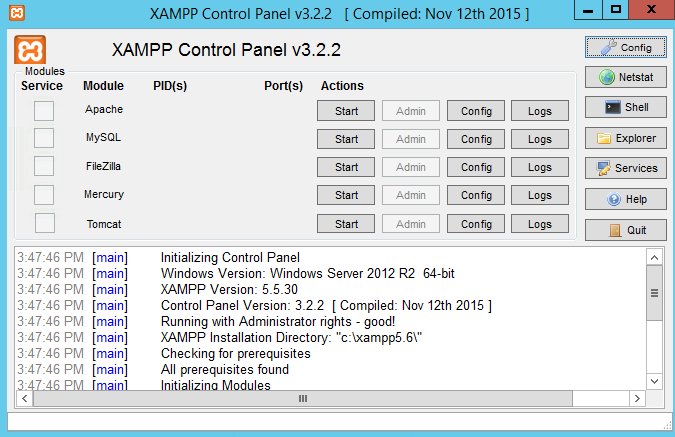
Hence, Starting Apache & MySQL means you are ready for the first project of PHP.
Step 4:
Let’s check whether its working or not.
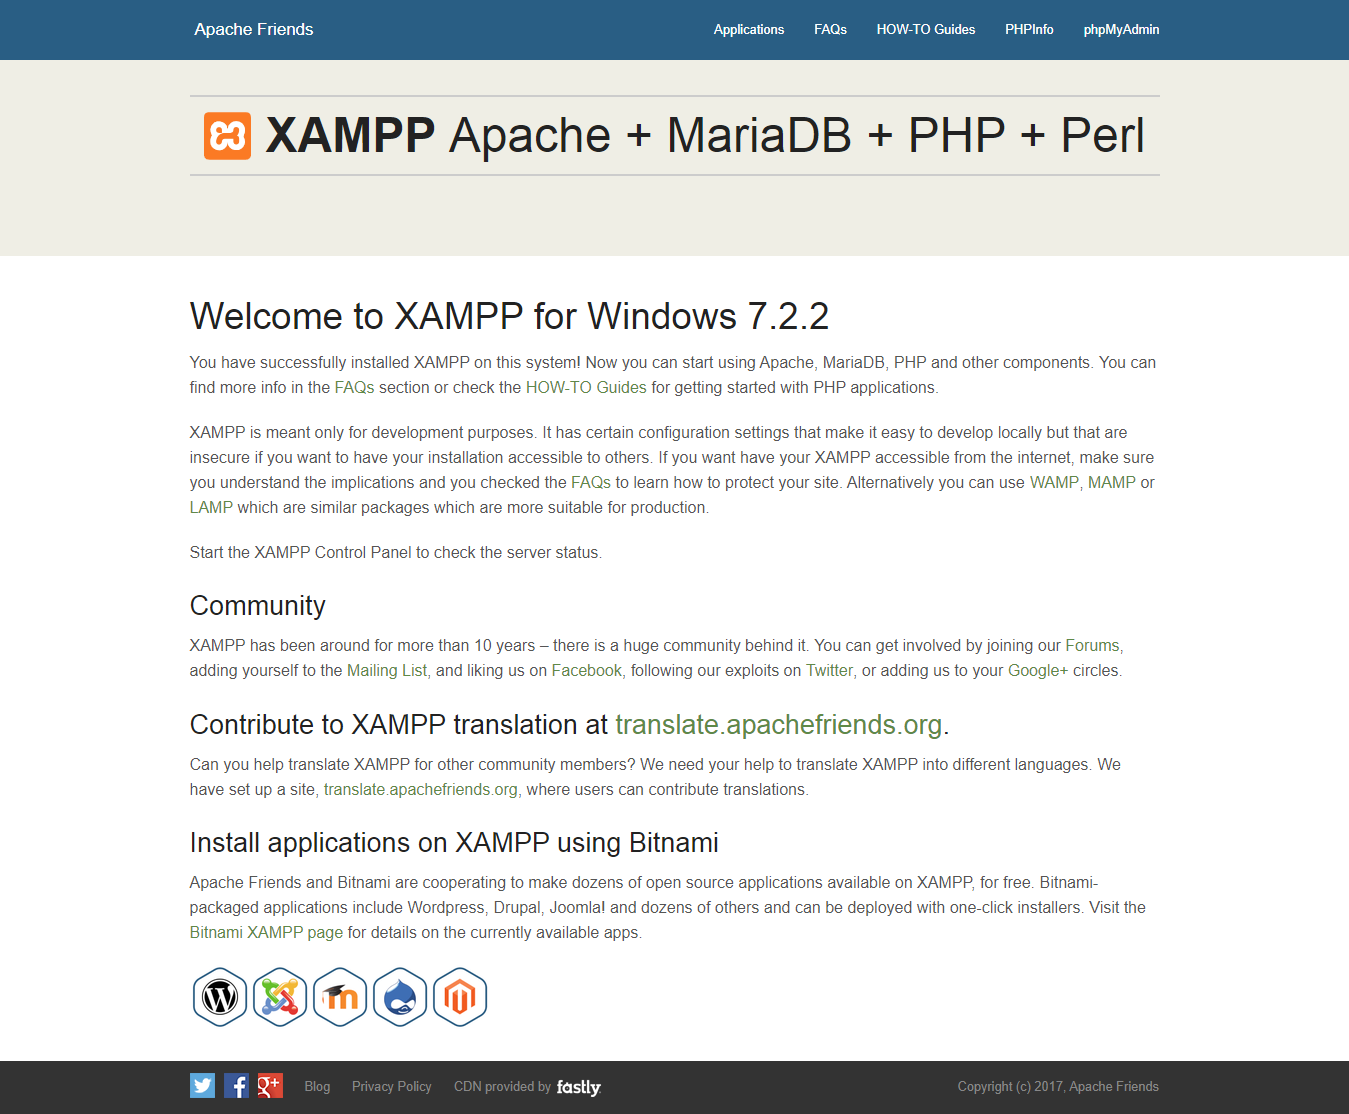
Go to your web browser, then follow this link:
http://localhost/dashboard/If this screen appears then, congratulation you are almost ready.
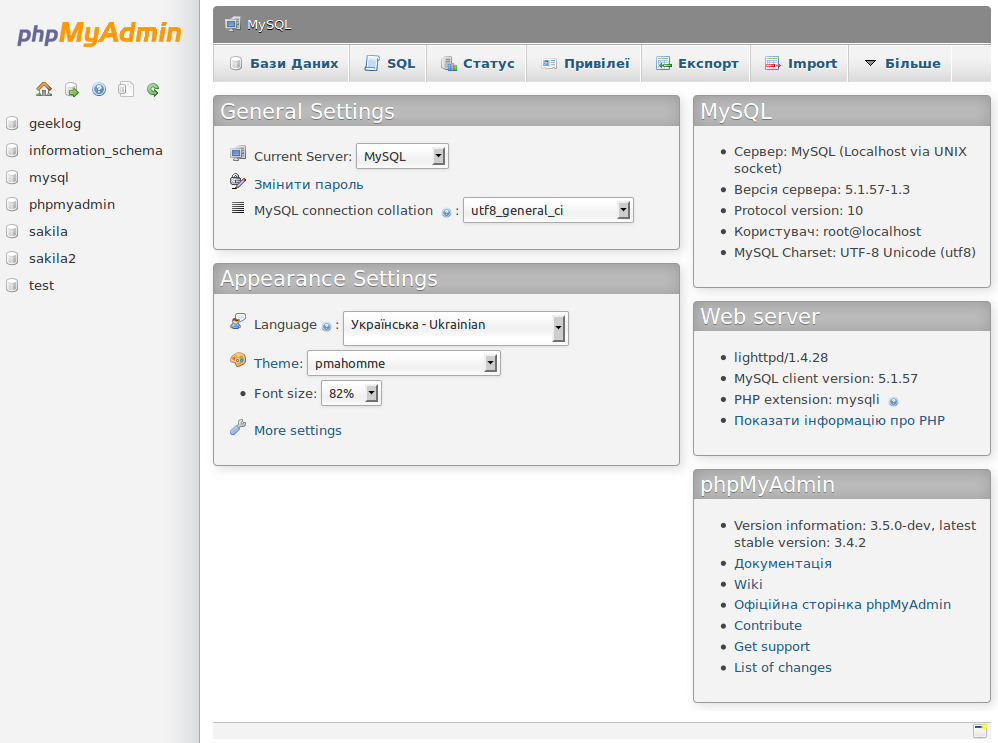
Now, let’s check if the phpmyadmin server is working or not.
To check, follow this link:
http://localhost/phpmyadmin/If this screen appears, then you are now ready for PHP.
Step 4:
Creating your first project: How to run PHP scripts after installing XAMPP?
It’s pretty much easy running PHP once you have finished PHP installation. Follow these steps:
- Find the path “C:\xampp\htdocs” for your Web server.
- Create any folder name you need to test PHP files in, under the “htdocs” folder (Example: trytoprogram).
- Make sure your PHP files are saved in this folder “trytoprogram”; they must have the “.php” file extension.
- use the address “localhost/project_folder_name/your script.php” to open them in your browser.
If you create a folder named “trytoprogram” then use the address “localhost/trytoprogram/index.php” to open them in your browser, if you have written scripts in index.php.
With those 4 steps, you have installed PHP and created your first PHP project.
Summary:
Set Up PHP on Your Own PC
Therefore, installing PHP with Apache & MySql server.
- install an apache server
- integrate PHP
- setup a database, MySQL.
To install manually:
The official PHP website (php.net) has installation instructions for PHP:
http://php.net/manual/en/install.php